
Ignite Two-Factor Authentication Setup
FTC/GLBA regulations require two-factor authentication (2FA) setup in order to access the Ignite Command Center (iCC). Please follow these basic steps to setup your 2FA:
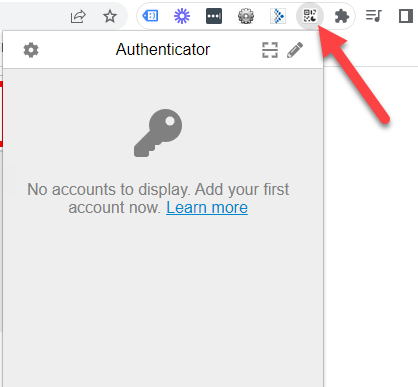
Users can set up multiple authenticators via desktop and smartphone to give them more than one option to select an authentication code. Only one is required, but both can be set up for more flexibility for the user.
Please follow the Prerequisites first before moving on to the setup.
Prerequisites
First the user will want to download a 2 Factor Authenticator app via one of two ways. Both setup options can be followed to allow users to have multiple authentication options.
PLEASE NOTE, when you download the app or extension, you must keep the app downloaded on your phone or your extension added to your desktop as you will need to access the code from these tools again in the future. This is not a one time setup, MFA requires an updated code ever so often to be re-added.
Desktop App
You will want to open the browser you most frequently use and download the Google Authenticator Extension. Choose one of the links below depending on which browser you use.
Install Authenticator Extension (Chrome, Firefox, Edge)
OR
Mobile App
Recommended if you visit the ICommand Center on multiple devices.
Open your Smartphone, find the Google Play app or Apple App Store, search “Authy” download the Authy App

Setup Guide
Desktop Setup
Once you have downloaded the Google Authenticator extension on your desktop you will follow the steps to create an account and set up your 2FA within your iCC account.
- You will need to login to your iCommand Center: https://auth.interactcp.com/Account/Login
- Once you have clicked Sign In you will be directed to the Two-Factor Authentication setup screen. Here, you will click the Add Authenticator button.

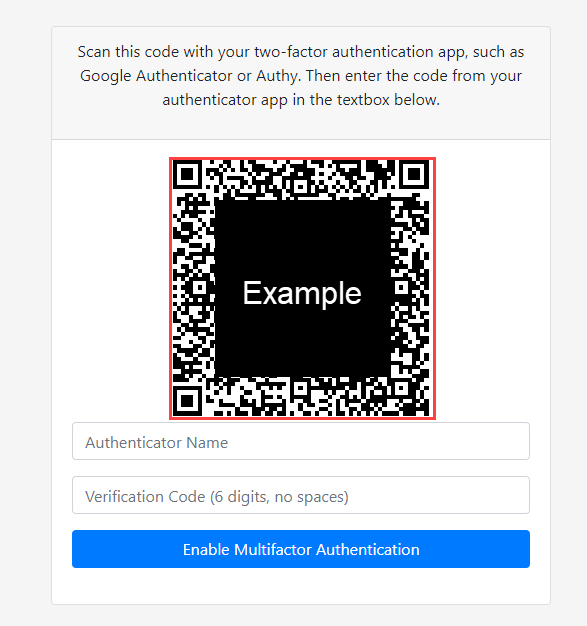
- After you click the Add Authenticator button you will receive a QR code to scan with the Google Authenticator

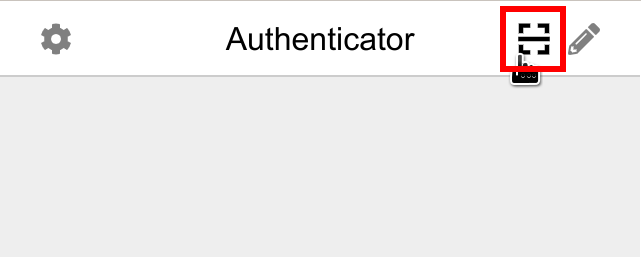
- Click Authenticator Extension’s icon in your browser in the upper right corner of the window.
- Click the scan icon at the top right corner of the window.
- Click and drag to draw a square that completely covers the QR code. The red box in the example shows you that you want to drag to draw a square around the entire QR code.
- After a few seconds a pop up will appear telling you that the auth.interactcp.com account has been added and you will click ok.
- Next you will want to add an Authenticator Name that identifies which authenticator you are setting up. For example, since you are setting this up for your iCC account and you are using the desktop authentication setup you could type in the name – iCC Desktop.
- Then you will open the Google Authentication extension again. You will click on the 6-digit number (Note – you might get a prompt to allow the copy and paste). You will click “Allow”. You will need to click the 6-digit number again and you should see “Copied” text appear for a moment. You then can paste that number into the Verification Code field below the QR code. You will have 30 seconds to copy and paste the number and click the Enable Multifactor Authentication button or you will need to copy and paste the number again from the extension.
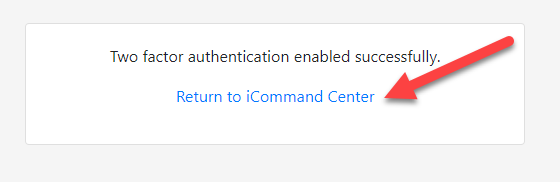
- If the code was successful, you will get a confirmation screen and you will click Return to iCommand Center.
This concludes the setup of the desktop version. If you wish to also add a second authenticator via mobile, Click Here and follow the mobile setup instructions.
If you have any questions or need help with this set up, please feel free to contact [email protected] or 800-515-9672 (option 4) ext. 20001
**Please Note**
Once you have accessed your iCC account, when you log out of your account, the next time that you log in, you will be required to add the Authentication Code.
- You will open your desktop authentication extension.
- Click on the 6 digit number and paste it into the Code field.
- You will want to check the box that says “Remember This Device” so the next time you login you will not need to add another code for a while.
- Click Sign In.

Mobile Setup
Once you have downloaded the Authy App on your phone you will follow these steps to create an Authy account and setup your 2FA within your iCC account.
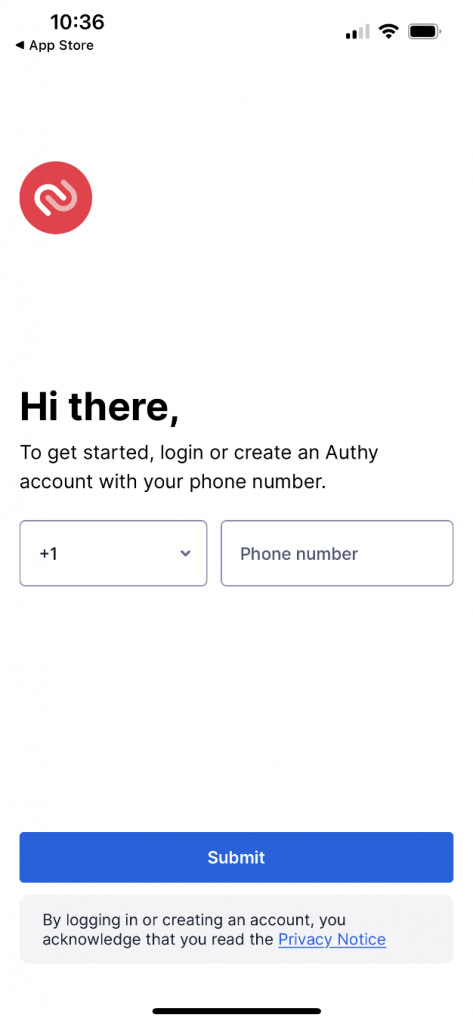
- You will need to setup an Authy Account – first you will add your phone number and then click Submit.
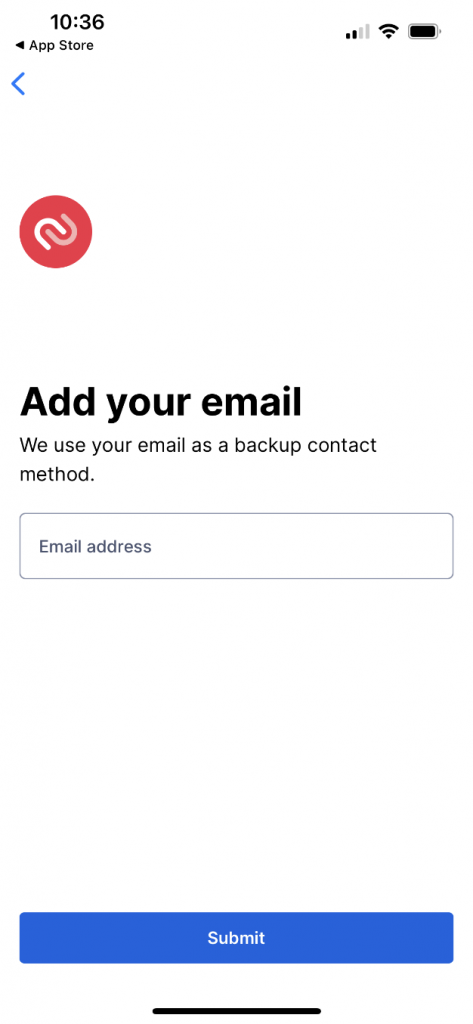
- Then you will add your email address and click Submit.
- Then you will be asked to complete a 2-factor authentication via text message or phone call in the Authy App. This is for the Authy App only and does not affect your 2FA for your iCC account.
- Once you have completed their 2-factor authentication, you will arrive at the Authy Account Screen
- Next you will want to login to your iCommand Center: https://auth.interactcp.com/Account/Login

- Once you have clicked Sign In you will be directed to the Two-Factor Authentication setup screen. Here, you will click the Add Authenticator button.

- After you click the Add Authenticator button you will receive a QR code to scan with your phone’s camera.

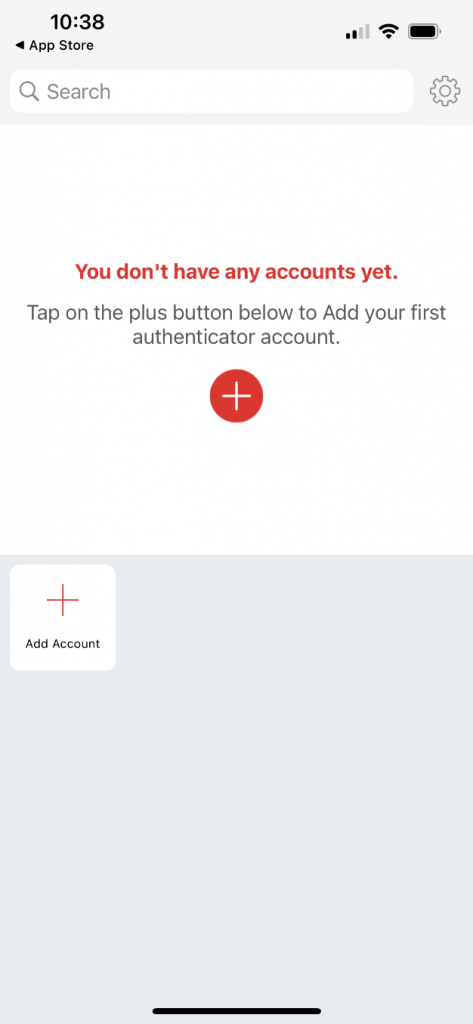
- Open your Authy App on your phone – you should see this screen when you open the app.

- Click on the “Add Account” button with the plus symbol. Once you click that button, you will see this screen come up and you will want to click the “Scan QR Code” button.

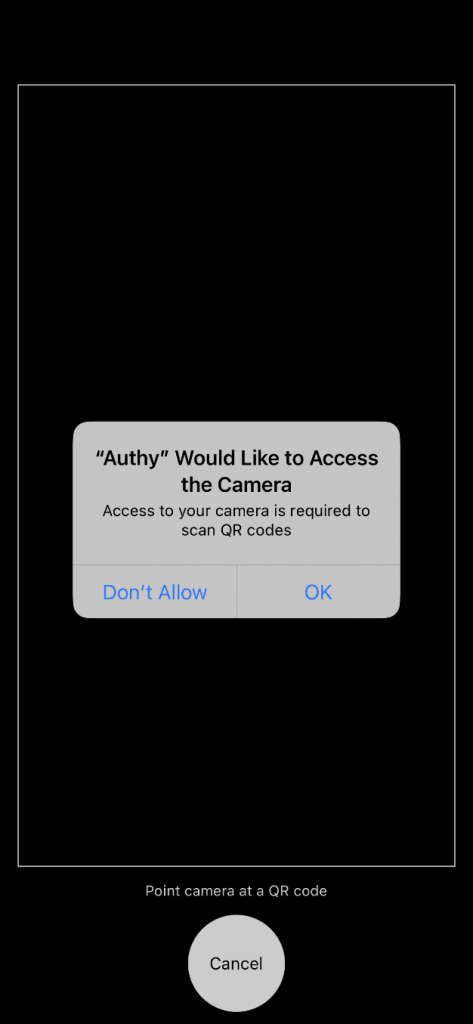
- Once you click the Scan QR Code button, your phone may give you a prompt for the Authy app to access the camera on your phone. You will click “OK” on this screen.
- Once you are on the screen with the QR code you will do two things:
- You will want to add an Authenticator Name that identifies which authenticator you are setting up. For example, since you are setting this up for your iCC account and you are using the mobile authentication setup you could type in the name – iCC Mobile.
- You will point the camera on your phone to the iCC screen where you see the QR code.

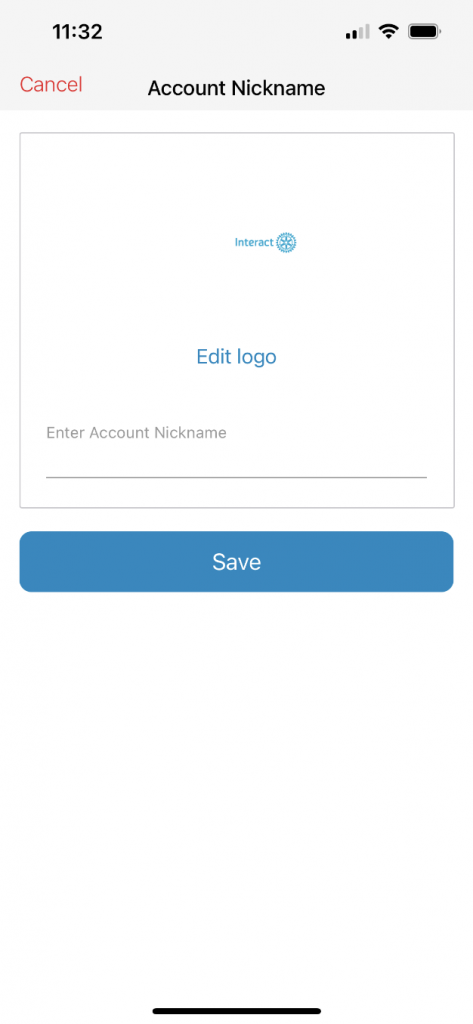
- Once the camera reads the QR code, the app will prompt you to enter and save an Account Nickname ON THE PHONE. It should prefill a nickname for you, but you can change it by selecting the name and typing in a new nickname. You will then click the Save button. (Note – this nickname does not need to match the name you added into iCC).
- After you have clicked the Save button, it will ask if you would like to create a Backup & Sync – you can enable a backup password or skip this step. If you click the Skip button, the next screen will display the 6-digit code that you will need to type into the iCC verification field. **Note – when entering the password, do not include a space between the digits. Type all 6 digits together into iCC.**

- On the iCC verification code screen, you will have 30 seconds to type in the 6-digit code into the iCC screen that you see here. If you cannot click Enable Multifactor Authentication button within 30 seconds, type in the new code you see on your phone.

- If the code was successful, you will get a confirmation screen and you will click Return to iCommand Center.

This concludes the setup of the mobile version. If you wish to also add a second authenticator via desktop, Click Here and follow the desktop setup instructions if you have not already.
If you have any questions or need help with this set up, please feel free to contact [email protected] or 800-515-9672 (option 4) ext. 20001
**Please Note**
Once you have accessed your iCC account, when you log out of your account, the next time that you log in you will be required to add the Authentication Code.
- You will login to your iCC account.
- Open the authenticator app on your phone and type in the 6 digit number into the Code field.
- You will want to check the box that says “Remember This Device” so the next time you login you will not need to add another code for a while.
- Click Sign In.
